Notes
This recipe will work well with almost any fruit, in any combination. Try apples and pears, pears and plums, peaches, nectarines or apricots or even berries. The riper the fruit, the sweeter the tart.
Ingredients
- 1 cup all-purpose flour
- ? tsp table salt
- 4 Tbsp unsalted butter, cold, divided
- ? cup buttermilk, cold
- 2 Tbsp all-purpose flour, for rolling out dough
- 4 large apples, Granny Smith
- 2 tsp fresh lemon juice
- ¼ cup sugar
- 1 Tbsp caramel topping
Instructions
- Place oven rack in lowest position; preheat oven to 400 °F.
- Place cookie sheet in oven on rack.
- Place 1 cup of flour and salt in a large bowl.
- Cut 3 tablespoons of cold butter into 4 to 5 pieces; work butter into flour mixture with a pastry cutter or fork (pieces of butter should resemble small peas).
- Add buttermilk and work dough until it just starts to come together (do not overwork dough; pieces of butter should still be visible).
- Gather dough together into a ball and wrap well in plastic wrap. Pat dough into a hamburger shape; chill for at least 20 minutes (or up to 2 days).
- To roll out dough, dust a large piece of wax paper with flour; set dough in middle of flour.
- Dust a second piece of wax paper with flour and cover dough, flour-side down.
- Roll out dough to an 11- or 12-inch circle; place in a 10-inch round cake or tart pan.
- Work top edge into a decorative scallop.
- Chill for at least 20 minutes (or up to 2 days).
- Peel, core and slice apples into ?-inch-thick slices; place in a bowl as you work and sprinkle with lemon juice.
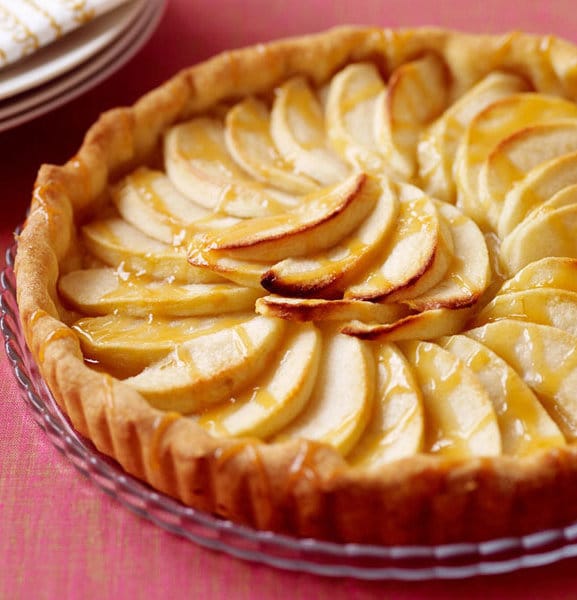
- Arrange apples slices in pan in concentric circles like a rose starting on the outside rim; apple slices should overlap tightly.
- Sprinkle sugar over tart and dot with remaining butter.
- Bake on top of cookie sheet until apples are tender but not mushy, about 40 to 45 minutes. (If apples get too brown at any point, place a loose piece of aluminum foil over the tart and continue baking.)
- Remove tart from oven to cool.
- Drizzle caramel over tart, slice into 8 pieces and serve immediately.
Recipe and Photo: desserts.wikia.com / CC BY-SA


